Showing posts with label steampunk illusionist. Show all posts

Monday, February 20, 2017

New Video From The Steampunk Illusionist


To give you a little background, the first week of Jan 2017, I started a new project called Weekly Wizardry on Facebook. The idea is to post new magic trick videos every week all year long. Some weeks will have more than one, so when it's all over there will be about 58-62 unique magic videos.

All of the videos are short, 30 seconds to 1.5 minutes. That might change as time goes on however. The latest video (above) featured a 100 year old magic item. Knowing of course that the magic from 100 years ago was presented in a slower and more deliberate fashion, I had to try and come up with a way to make it fit modern standards but still have the old time feel. I believe I accomplished the goal well.

But an amazing thing happened. After we worked out the handling of this new/old trick, we began to see it as not a stand alone effect, but rather part of a much longer and more in depth magic routine. This is VERY exciting to me and the work has already started on a sort of magic/manipulation act that begins with the item you see above and morphs and blends into other effects, culminating in a lot of interesting surprises along the way.

One issue we have is that some of our material is very Victorian and other stuff is clearly Steampunk. Finding a happy medium between the two is the tough part, but we are working on it. I expect to have a general outline of the act very soon!!!

Thursday, December 15, 2016

Update From The Steampunk Illusionist


I know I've been kind of quiet lately, but that has only been here. I've been busy working on the show and performing the Steampunk Illusionist Show. As with many projects, this one is in a constant stage of development. We are 'growing' the show as I type this. We will be adding many new things to the show, from new routines and new illusions, to new products to sell after the show.

One of the new routines in the show is our Spirit Cabinet, right from the playbook of Anna Eva Fay
herself. Actually, the Spirit Cabinet will also be the backbone of another show we are creating that is about ghosts and spirits! But we will include the Spirit Cabinet in our other shows as well. We had a great time presenting it during October for many of our Halloween shows. For those unfamiliar with a Spirit Cabinet, here is the basic effect. A medium, in this case my assistant Denise, is tied to a chair  She is placed in a trance so that in this state she can summon spirits of the dead. A table with a bell, tambourine and other objects sits next to her and a curtain goes around the medium. As soon as she is out of site, the bells ring, tambourine shakes and other odd manifestations occur. The moment the curtain is opened, the medium is found to still be in a trance state, still tied securely as before. It's quite an amazing presentation.

There are other new effects in the show as well, but I'll share those at a later date. For now, I would like to share with you an updated promotional video of the show. It's fairly short, and shows clips from different performances. We tried to give it an old timey feel by using an aging filter. I'm not happy that Youtube made me change the music. I had paid for the music I originally had, but for whatever reason, they would not allow it. The music that is on there is similar however to what I had. I hope you enjoy the video!


Saturday, August 06, 2016

The Steampunk Illusionist Returns!


I feel as if it has been a very long time since I stepped on stage as The Steampunk Illusionist. It's actually not been that long, but with the passing of my Father, time seems twisted and unfamiliar. That being said, The Steampunk Illusionist DID return to the stage this week. We had the honor of performing at the Locust Shade Park Amphitheatre in Triangle VA. It's a wonderful venue that holds up to 600 people. The audience is covered as is the stage, but with the hot August days, it can still be a challenge, and it was.

The temperature was in the 80s the day of the show. Though we were doing the smaller version of the
show, there is still a lot involved in the set-up. We planned a rather ambitious show that we felt would be received enthusiastically. Imagine our surprise when we arrived to find we left our closing effect at home. That situation was a crushing moment as we had worked so hard on this new ending to the show.  We had all the other parts to the closer, including new costumes and such, but the one key piece we needed was missing. So, we quickly had to reorganize the order of the show. We chose to close with our signature Traveling Bottle and Glass routine. This effect is a popular one among stage magicians, but almost everyone I have ever seen perform it does the exact same routine. Now, there is nothing wrong with the original routine, but we wanted something a little different. Our routine uses two people and has a lot of extra comedy due to the antics of my assistant Denise.

We had a couple new routines in the show which I was very proud of. One is an effect with several feathered plumes. The plumes magically change color, again and again. I think it may be my new favorite routine. The other new addition was the Silk Pedestal which dates back to the Victorian era and plays very nicely. I believe that I am going to expand on this routine and make it more of a feature.

The show also included my Steampunked Disectolator illusion, where my arm gets cut into three pieces. And we also do a wonderful effect with three borrowed finger rings that appear in a most impossible location. All in all, we presented 12 routines in our 45 minute show.

There are more new routines that will be going into the show soon. One which is based on a real Civil War era spy! 


Monday, June 08, 2015

Exploring More Victorian Magic


I'm currently attempting to recreate a routine that was made famous by a number of Victorian Era magicians. The routine has been known by many different names, but the most common was The Flags of All Nations. Interestingly, the routine had as many variations as it had names.

First created by the Viennese magician Johann Hofzinser, he called his creation The Patriot. The basic effect is that a number of small flags transform into larger flags and eventually into one or more fans of flags and then a giant flag and flagpole appear.

This was one of the hottest effects of it's time having been performed by all the top pros of the late 1880s and early 20th Century. So popular was this trick that it appeared on many stock magic posters. A stock poster was one that had the image of a magician but no name on it. A magician then could add his name to the poster and have his own advertising piece without going through the hassle and expense of the bigger named performers who had to have their posters custom made.

My version of The Flags of All Nations is still in development, but above you can see two handkerchief fans. In real life they are multicolored scarves, not flags. But they'll do just fine fitting into the overall routine. I located a number of miniature flags of various nations and also some flags that are almost the size of my silk fans. I only need a few more pieces and I think I'll have all the items I need to recreate this mystery from the past.

If you're wondering why this was such a popular routine well there are multiple reasons. People were flocking to the United States in droves during the late 19th Century and early 20th Century. They came here to become Americans, but had their roots in other lands. So when a magician produced a flag from the country of their origin it was exciting for them to see. And then when it concluded with the Stars and Stripes, well who would not be proud of that? The wonderful thing about the routine was it was easily adapted to whatever country you were in. For example, if you were in England, the final flag would not be the US Flag but the Union Jack. All the other components of the routine could remain the same but the final flag production would change to the country you were in. 

Some performers had to learn the hard way about this. One magician was performing in Canada and finished with the US Flag. It actually got boos from the audience because at the time Canada and the US were involved in a trade dispute. So this magician changed the final flag to that of the Canadian National Flag and had much better results.

Below is an image of a magician who included among his routines the Flag trick.

Sunday, April 19, 2015

The Steampunk Illusionists Are At It Again!


The Steampunk Illusionists were back on the stage this weekend with a little magic. After quite a long absence their Traveling Bottle and Glass routine returned to the show. This routine was removed from the show almost 10 years ago. Through a combination of misunderstanding, miscommunication, and just a bad decision, the routine was pulled and probably would never have seen the light of day again had it not been for a recently discovered video of the routine.

At the time of it's removal from the show, The Traveling Bottle and Glass was in an experimental state. That means we were changing the routine fairly often, trying different things to see what would work and what might take the routine to another level. In the midst of all the changes, the original routine got lost. But thanks to the forgotten video recording the old routine has been brought back.

The classic trick is known as The Multiplying Bottles. But we prefer to call it the Traveling Bottle and Glass. We do not do the classic Ken Brooke presentation of the trick. Ours is done to music and at first appears to be a one person routine, but then a mischievous assistant shows up to wreak havoc on things. The result is a very funny comedy routine with the magic taking a secondary place.

We also presented The Disectolator in the show. In fact, this was our opening illusion. This is the device where I slice my arm into several sections and actually remove one of the sections. It's a quick routine, barely a minute, but a nice opening.

Our Ring in Bread made it into the show as a last minute decision. I'm glad we put it in the show but not for the usual reasons. We need to really update this trick and punch up both the magic and the comedy, so having it in the show was a reminder to start working on this to take this trick to the next level. I know there is more to work with here, and this routine has not reached it's full potential yet. It's possibly that the show on Saturday will be the last time the routine will be in the show. There will still be a borrowed ring routine, but whether it is discovered inside a loaf of bread or some other place is yet to be seen. Time will tell.

Monday, April 06, 2015

New Promo Video for Steampunk Illusionist


I am always tinkering. I guess that's one of the reasons I like steampunk so much, you can take something old and make it into something new and cool again, usually by tinkering with it. Well, I've got yet another new promo video. I really like it, though I know in a couple weeks it will be altered again. I'll be slowly removing the non-Steampunk clips in favor of new Steampunk clips. But all the material in the video is or has been used in the Steampunk show.

Enjoy the video!

Sunday, March 29, 2015

Steampunk Monkey Make-Over


This is kind of funny really. I've taken what is essentially a toy Monkey w/Cymbals and given him a bit of a Victorian make-over. Now he is a SteamMonk! Actually, this monkey is a bit more than just a toy. He has been rebuilt to respond to questions and will eventually be doing a magic trick of his own.

I've been doing test runs with him the last couple weeks to see how audiences respond to him. So far, they've really taken to the SteamMonk. He also seems to have universal appeal, the adults are as into the monkey as kids are. I have had a few technical issues, so all that needs to be worked out. But so far so good.

Below is how he looked prior to his make-over. (kinda creepy)

Monday, March 16, 2015

Steampunk Illusionist Interview


A few weeks ago I was asked to do an interview for The Steampunk Makers Blog. I really enjoyed the process because the questions were not the normal kind I get. Below is a link to the interview, it's short but a fun read. Enjoy!

http://www.steampunkmakersmall.com/steampunk-blog/dean-carnagie-the-steampunk-illusionist-interview-by-lynne-lumsden-green

Friday, March 13, 2015

Telsa for Inspiration

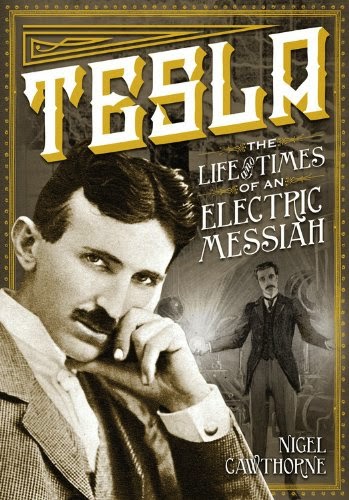
I'm fascinated with Nikola Telsa. The more I read about him or learn about him the more amazing he becomes. This week while book trolling, I found a book called Tesla The Life and Times of an Electric Messiah by Nigel Cawthorne. It's a picture biography, more coffee table book than true biography, but that isn't important. What is important are the huge numbers of photos and illustrations of his inventions.

I picked up the book mainly as a source of inspiration for my next steampunk project. And that is the reason I'm sharing this with you, as a potential source of inspiration. The book talks about his inventions, his theories, and those created by others. 19th Century Science is at your finger tips with this book! Well, at least the general idea of it, not the specifics of it.

IF you are into Steampunk, then you'll want to check out this book for the same reasons I did. I can't vouch for how good of a biography it is, because I've not yet read it. But I have glanced through the pages and enjoyed many of the photos and illustrations.  Click the link above and buy it from Amazon. I got mine through Books A Million and actually paid a little more than Amazon. But it's worth it!

Sunday, January 25, 2015

Steampunk for the Newbie

If you're interested in learning about Steampunk and are not sure where to start, I'm going to give you a few places to look. First, up are some books. These books initially guided my way into steampunk and also helped to inspire me in some cases. Though I don't buy into everything written, they serve as a solid guide to the world of steampunk.

The Steampunk Bible & The Steampunk User's Manual by Jeff Vandermeer. These books contain all the basics to point you in the right direction. They're filled with incredible photos as well of everything from costumes, gadgets, to ray guns and music and performance. Good stuff.

Steampunk-An Illustrated History of Fantastical Fiction, Fanciful Film and Other Victorian Visions by Brian Robb. This book will also give you a solid foundation into steampunk. The author spends a fair amount of time discussing the origins of steampunk in literature. Tons of information in this book and a great deal to inspire you.

Steampunk-The Art of Victorian Futurism by Jay Strongman. This book has a little bit of information on steampunk, however that is not the focus of the book. The true purpose is to showcase examples of steampunk creations by various artists. THIS is a must have if you want to build props. It will help you to see what others have done and also show you by example that steampunk is far more than gears. If you're not a good do it yourself-er, this book may also scare you away, lol.

Steampunk really has it's roots in literature. Jules Verne and H.G. Wells being the fathers of the genre. But there are many others that can be included in the mix, like Mary Shelley, Edgar Allan Poe and even Sir Arthur Conan Doyle. And then there are the modern day Steampunk authors like Michael Moorcock, K.W. Jeter, James Blaylock, Stephen Hunt and many others. There is a great list of modern Steampunk authors and their books here.

There are of course a myriad of Steampunk Movies starting with 20,000 Leagues Under the Sea (Disney) The Time Machine, The League of Extraordinary Gentlemen, Time After Time, Journey To The Center of the Earth(1959), Five Weeks In A Balloon, Chitty Chitty Bang Bang, The Prestige, Johah Hex, Hugo and many others. Check out this list for more.

And if you're really anxious to get your feet wet, why not attend a Steampunk Convention? Here is a partial list of events going on in the near future.

Of course, if you are interested in Steampunk Magic, stay here or go to SteampunkIllusionist.com

I hope that helps.

Monday, November 10, 2014

Once Upon A Time...In the World of Magic

Once Upon A Time. Many great stories began with 'Once Upon A Time'. This story today does as well, except unlike Fairy Tales and stories of old, this story is true.

Once Upon A Time, there was a Great Theatrical Magic Show, the likes of which had not been seen for many years. It was a show out of step with the times. It was a show that harkened back to the earlier part of the 20th Century. It was a show that was hard to describe, but the generally all agreed it was an 'amazing spectacle'. The show was called Le Grand David and His Own Spectacular Magic Company. Actually an odd name for a show, yet that is what it was called. Le Grand David was played by David Bull and he received top billing as could be seen on the posters. But the brainchild behind the show was an older wizard, his stage name was Marco The Magi, and he was played by Cesareo Pelaez. On many posters, the name Le Grand David was printed/painted in bold letters, but often in smaller letters near the top of the poster were the words 'Marco the Magi's production'.

The show ran for 36 years until Marco/Cesareo passed away. He died before the performing season was over, so the cast decided to finish the season in tribute to their patriarch. And then it was no more.

I could write volumes about the show and the cast. In fact, I have written quite a lot over at my other blog. But I'm not really interested in doing a bio of the show right now. Rather, I'd like to show how that show relates to Steampunk.

Steampunk has a lot of DIY built into it. If you want to create costumes, props and such, it's rather tough to go out and purchase ready made steampunk items (though as the popularity grows it is getting easier to purchase some things). The joy of steampunk is just as much in the creation of things as it is the displaying of these items. This was the way the Le Grand David show operated. They built the props, the illusions and the set pieces. They sewed the costumes and curtains. They painted the posters, scenery and so forth. Most things were done in-house. The results were astonishing.

The show was very retro, in that it was really from another time. The show was a mixture of the types of shows young Cesareo saw in his youth. The traveling magic shows of Fu-Manchu, Chang, Richiardi and others from the 1930s-50s. In fact, some of the routines from these older shows found their way into the Le Grand David Show. Anyone who had seen those shows would definitely know where the inspiration came from. But everything in the LGD show had it's own unique touches to it.

Look at this prop to the left. To me it has a very Victorian appearance. A 3-Fold Screen, colorful yet not overdone, rather the colors are more subdued.

The original inventor of this illusion was very much the product of the 19th Century. His name was Theodore Bamberg, he was born in 1875  and he came from a long line of magicians. His stage name was Okito, and for many years he performed what was called an Oriental Magic Act. His creations were too numerous to mention, but they were all works of art. Also, Theo built them all by hand. He was a skilled craftsman. He knew how to handle tools and how to work with wood, metal and fabric.

In addition to his Okito show, he also performed something called Shadowgraphy. What could be more Victorian sounding than that? Shadowgraphy was the art of creating shadow images with your hands. Theo Bamberg was not the first to develop this into a stage act, but he was certainly one of the best. Okito was the father of David Bamberg, who performed as Fu-Manchu. It was Fu-Manchu who was one of the biggest inspirations of Cesareo's life.

The 3 Fold Screen Production was used by the LGD Show for many years, possible since the very
early days. At some point they added a new 3 Fold Screen to replace the one pictured above. Again, the colors are not bright and circus-ey but rather almost earth tones. Notice the very different design scheme however. Please also notice how intricate that design is. Now consider this, that was painted by hand. And painted by one person, a fellow named Rick Heath. Rick was a lead painter in the company and he painted scenery, props, illusions, posters and much much more. He hand painted ceiling tiles in the theatre lobby. He painted the side walls in one of their theatres (they owned two of their own theatres in the same town). When I say he painted walls, I don't mean like a normal construction painter might do, no. He painted flamingos on the walls, hundreds of them and they made an awe inspiring site.

With any luck Mr. Heath will get a shot at Steampunk because he and I have been discussing a project for my show. I can't reveal what it is, but it will be one of a kind and quite a sight to behold, like all his works of art are. By the way, you can see some of Rick's amazing artwork, both magic and fine art on his website http://www.magicianwithapaintbrush.com/home.html

I will leave you with one final image, a picture of one of the breathtaking curtains from the LGD Show. This one served as the backdrop for Marco the Magi's version of The Floating Table. I remember the first time I saw this curtain. I was dumbstruck by it's beauty. It just so happens that today, I own this magnificent backdrop.  It serves as a reminder of what you can do when you put your mind to it. Is it steampunk? I don't know.  But it's likely going to be in the larger version of The Steampunk Illusionist Show in some capacity. Enjoy!

Friday, October 24, 2014

Victorian Magic Show from 1903

The Illusionists 1903 is the third troupe of magicians from the show The Illusionists. This troupe is made up of Victorian Era Acts or acts that 'could have' been from that time I should say. We auditioned for the show but were not selected. Perhaps as the show progresses and they need a replacement, maybe we can once again try out as this show is made for us.

I'm not 100% on this but it appears the acts consist of Mark and Jinger Kalin, Rick Thomas (sporting a mustache), Armando Lucero, Jonathan Goodwin (the only none magic act), Charlie Frye and then two performers that I don't instantly recognize (though I think I might know who they are but I don't wish to miscall them).  That certainly makes up an interesting troupe and one very different from the other two shows.

The moment they get a Facebook Page or website for the show, I will post it here as I wish to do all I can to support their efforts. Victorian Magic is my middle name, well actually it's Alan, but you know what I mean. The show opens in January at the Queensland Performing Arts Center in Australia. Below is the first commercial video for the show.

Tuesday, October 14, 2014

Updated Steampunk Illusionist Website is Ready


I spent the weekend making tweaks and updates to my SteampunkIllusionist.com site. I was not happy with the conversion rate on the site (meaning the number of people who signed up for my newsletter or e-promo kits). The way the site is set up, I think, is kind of cool. I've taken the Wizard of OZ approach, in that everything that you can see on the outside is made in sepia toned colors. But once you sign up for the newsletter or e-promo kits, you get to see everything in full color.

The e-promo kits are essentially the same as the promotional kits and dvds that I might send a client in the mail, except now you can view them online. There are videos, some of which can only be seen within the e-promo kits and no where else. I also have full descriptions of the shows and prices for most of the shows. One of the videos is of The Disectolator in action. That's the illusion featured in the photo above, as well as the subject of a number of my previous blogs.

Speaking of The Disectolator, I'm getting ready to work on The Disectolator 2.0, which is going to be slightly different from the original, in both appearance and execution.

I got an email from someone the other day asking me about the picture to the right. They had seen it on my site and wondered what exactly it might be. Believe it or not, it's an interactive routine that involves the entire audience. There are currently three different routines that can be done with this prop, and more possibly on the way.

The routine was not originally supposed to be in the steampunk show, but it's such an oddball kind of thing and given the fact that the hand is actually mechanical, I thought it fit in quite well. I'm contemplating making another hand to replace this one that is more robotic. Right now, with the current hand the fingers bend down and that is all. But I'd like the make the hand so the fingers bend at every joint and could be operated from backstage. It might be too much effort for one routine, but we'll see.

By the way, if you'd like to see the Hand routine and The Disectolator, I'll be presenting both (maybe) in Leesburg VA on Saturday Oct18th at the Temple Hall Farm Regional Park at 1pm. I say 'maybe' because if it's raining or if I can't set up my backdrop, I'll probably have to eliminate the Disectolator.
Let's hope for good weather and no wind! :)

Monday, September 29, 2014

A Few Questions About My Steampunk Magic Props


I've gotten a few questions about my magic props of late that I'd like to address here. The first one came from someone who is not in the magic world, but I liked the question.The others were from magicians, so I hope you enjoy my answers.

1. Why don't you paint your props like other magicians with red/black and dragons on it? This was
a popular trend for a long time, too long in fact. I think it was also part of what killed apparatus magic. Performers like Okito, Fu-Manchu, Chung Ling Soo and others who presented an asian style act, had their props decorated to look like they came from their respective countries. Often there was a dragon or chinese letters written on them. This was done for a specific act and they were generally very tastefully and artfully designed. But magic dealers (those folks who sold magic props) for whatever reason thought this was popular among ALL magicians so they began producing these types of things. Unfortunately, when the magic dealers recreated these props, they didn't have either the skillset or talent for design. The props themselves were well made, but they dropped the ball in the finishing. What is sad is the paint was applied skillfully, but the designs and stenciling were ugly. This all started in the early part of the 20th Century and continued until the late 20th century. It was in the 80s and 90s that the wheels came off and rather than put Asian designs on the props, some dealers painted the magic apparatus in circus colors and/or stenciled other designs on them that really made no sense. It was awful with no sense of style. In my case, I usually repainted my props anyway to suit my style. When I started moving to a steampunk act, I really altered the look of my props.

2. Why steampunk? I didn't always know what steampunk was, but I always had a keen interest in the designs of steampunk. I just didn't know there was a word for it. When I saw that there was this whole steampunk culture out there, I found that it was the perfect marriage for my kind of magic because I would be mixing science fiction, time travel, crazy inventions, victorianism together with magic. Much of magic is still highly influenced by the Victorian age because that is when many of the coolest effects and props were created. Sadly, for 40 years or so magicians have frowned upon the use of apparatus, mainly because the stuff looked so bad and they also didn't like the fact that a prop was given credit for the magic they created. I always found that the right presentation could make anything relevant and popular. Changing magic props into steampunk devices and such automatically pointed the way for solid routines. The prop made sense because the presentation made sense and all of a sudden old forgotten apparatus magic was alive again!

3. Steampunk designs often feature gears and cogs but your stuff has none of that. Why? True,
none of my current props have gears and cogs but that's only because I've not found the right use for them.
I don't want to put a gear on my prop simply for decoration. Gears and cogs have a function, they turn
and cause something else to turn or move. If I use a gear or cog I'd like the audience to see all of these
things moving, just as they'd see any clockwork device moving. I do insinuate clockworks into some of the props through cranking and ratcheting sound effects. But trust me, eventually I will have a clockwork type effect in the show.

4. Should everyone do steampunk? NO!!!! Hell no!!! This is the problem with magic as a rule, no one has an ounce of creativity and they just go with the latest trend until they run it in the ground. For the record, I didn't go after steampunk because I saw another magician doing it. In fact, when I started to get involved with steampunk, I checked to see if there were magicians using steampunk and almost decided NOT to do it because I found a couple who were. Ok, I'll give you the whole story. I found out there was a duo in Las Vegas about to do a big illusion show using Steampunk and I decided not to go with it. But then their show closed very quickly and that seemed to be the end of it. So I thought about it some more and realized that it was a perfect fit for me. I wasn't doing it because it was popular but because it fit my personality perfectly.

I think one thing the steampunk genre does is point out that there are other ways to go besides decorating your props with red/black and bad stenciled designs. And there are far more design schemes besides just steampunk. Here are a few examples of design ideas: Aviation design, lots of aluminum and rivets and gauges and propellers, that's cool. Race Car design: If you thought of your props as being built by a Formula 1 Race team, how would they look? Or what if a NASCAR Team built your prop, how would it look? Futuristic Design: This could go lots of different ways, you could go with a very streamlined design with lots of curves and colors like white, silver, gold and other metallic colors. OR you could go after a prop design right from the NASA launchpad. There are countless ways to go with futuristic.  Then you've got the RETRO LOOK. RETRO DESIGN could be anything from a 1930s Art Deco Look, 1950s Look, a 1970s look and so forth. Don't just do steampunk because you saw someone else do it.

Final Thoughts. Adding a unique design to your props is a great way to go to stand out from the crowd. If you are looking for inspiration, go to a furniture store, go to Target, go to IKEA, check out some of the modern designs that are being produced today. It's an amazing time to find incredible design concepts.

Once you've settled upon a design them don't stop at just the props. Consider your costuming and also consider something sorely forgotten, the scenery. Magicians very rarely have scenery, yet most stage plays, musicals and other theatrical shows have scenery. Even standup comics when they perform at theatres often have cool scenery. THIS should be the new trend more so than decorating props. Decorating your backgrounds!!! Rather than performing against black, or a curtain, create an actual set for your show. There is a trend among family style performers to use custom backdrops and this is a great idea. A great resource for backdrops and custom backdrops is http://www.showbackdrops.com/  My friend Mark Daniel was one of the leaders in using custom backdrops at his shows. He has a new backdrop made for every show he does. The backdrop serves a number of purposes. For one, if you have your name/logo on the backdrop it serves as advertising and branding. For two, it does act as your scenery, or at least the main part of your scenery. For three, it makes you look more professional. Most folks who use one of these portable backdrops only use one throughout the whole show. But I think if you're doing a stage production, you could actually use several throughout your show in an effort to 'change the scene'. Ok, that might be more than you can handle, but it's something to think about!

By the way, the photo at the top of the page is my steampunked 'Sawing a Spectator in Half' Illusion.

Hmmm, One More Thing. I didn't mean to poo-poo the apparatus magic of Okito and others at the start of the article. Their creations were incredible. It's just that the dealer items that followed for years and years tried to continue the same type of design scheme but they were usually poor recreations as far as design. They were well built items, just poorly decorated. NOW, having said that, if you are doing a themed act of some kind and the Asian designs work for you, I would like to give a plug to a modern day creator of those effects. Norm and Lupe Nielsen of NielsonMagic build faithful reproductions of many of Okitos props. In fact, Norm was actually taught personally by Theo Bamberg, the man who was OKITO. So if you are interested in obtaining a HIGH quality piece, you must visit their website at http://nnmagic.com/magicitems/okitonielsenpage.htm

Saturday, September 27, 2014

Another Steampunk Magic Illusion


In the world of magic, the term 'illusion' usually stands for a large effect using a person or large animal or other large object. The term 'illusionette' is kind of an odd term which is basically means a smaller illusion.

I just finished building a wonderful piece that was the creation of Larry White. It was a chore to build and I in no way did all the work myself. My father and I did the construction and I couldn't have done it without his help. It was a tricky piece to fabricate.

I'm calling mine The Disectalator, a Very Dis-Arming Illusion. I chose to go with a more subdued steampunk look. Not an over the top steampunk appearance on this one. It has one gauge which I think looks really incredible. I found this gauge on eBay. The folks I got it from also have a store called www.VintageWireAndSupply.com. They've got incredible electrical parts and devices to really take anything and give it a vintage appearance.

Other than the gauge, the only other steampunky looking thing were the bolts that adorn the top edge of the box and the lower section as well. These were all decorative, none of them actually serve a real purpose. I added brass corners onto the lower box and the upper box as well, just to give them a bit more Victorian look.

After working on this piece I came upon an idea for a slightly different illusion, so in the near future I'm going to be rebuilding the upper box for a new effect (which I'm not going to divulge right now).
The effect if you are not familiar is, the magicians arm is pushed through the upper boxes so that his/her hand comes out the far left end. Two metal blades are pushed thru the box dividing it into three sections and then the middle is pulled up, or zig-zaged as it were. The zig zaging can be seen below, minus the arm. I can't take the photo and be IN the prop, lol. I hope you enjoy it. Once the second version is complete, I'll post an image of that as well.


MORE: One of the joys of steampunk work for me is a project never quite seems to be done. Just when I think I've completed it, I find something I can add or replace to make it even cooler. In the case of this prop, I decided very shortly after taking the photos to add one more thing, really to balance out the prop. The right box has a gauge, the middle box has the handle, but the left box had nothing, so I added something to it. It also helps the routine as now the valve handle seems to serve a function, though in truth, that is an illusion


Monday, September 01, 2014

Building Steampunk Magic Props


One of the most common, and frankly frustrating, things I hear from magicians after they see my show is, "WOW, that was a really cool approach, I want to do that." Uggh. I'm by no means the first or last magician to incorporate Steampunk into his act, but the fewer of us there are, the better. Still, there are some who are not really interested in transforming into an entire 'steampunk show' but rather would like to have one really cool prop. So I'll give you some tips.

The prop at the top of the page began as something known as a Handkerchief Box or Jap Box. It's a
very old trick, but this one was built by me and my Dad, mostly my Dad on this piece. It was actually built for something other than making handkerchiefs appear and vanish. The one thing that makes it unique is it has one of those 'crank-noise- toys that you see around New Years that people use to make all sort of racket. One of those was built into the box so that when the handle is turned it gives a good loud ratcheting sound.

When I decided to move into Steampunk, this was one of the first props I chose to refit. It was a gradual process. The first alteration was adding a top to the box with a brass handle. Next I added a gauge on the side along with some buttons and knobs. I also took some fake leather and put that on each corner of the box along with some decorative brass tacks.

That was stage 1 and it stayed that way for a while. But I wanted it to be more animated and I eventually found a small toy that lit up and made sound. I gutted the toy, meaning I removed all the lights and electronics and put them into my box. This required a bit of soldering the first time around, but I was game for anything. I wanted the lights to really stand out, so I took three small gumball prize containers and mounted them onto the top of the box. The lights would go inside these plastic containers. I got the idea for these three roundish looking gumball prizes from the movie The Time Machine (see photo). I was afraid they'd look too much like  gumball prize containers, so I decorated them slightly by adding a large blue bead inside and putting one of those decorative brass tacks in the top. To my surprise, when I first mounted the containers onto the wooden box, the glue created a haze like finish inside the containers. This only helped it look more unique, so it was a lucky accident.

The prop remained this way for sometime, until I found some brass corners at Home Depot. Adding these to the four top corners finished the prop off nicely. I really thought I was finished at this point, but as fate would have it, that was not quite the case. Through use, one of the knobs broke off and the sound and light gimmick eventually died on me. This meant I had to replace them. Thankfully, the light/noise toys were cheap and fairly easy to install. As I was making the repairs, a friend was working on a disc drive and he had all these parts he was going to throw away. I quickly snagged the parts and added a number of them to the prop. These final additions really took the piece over the top.

Below is a video snippet showing the moving parts and the sounds and lights. Feel free to use this as inspiration, but DO NOT COPY MY PROP!!!! And if you're looking for places to find these unusual steampunk accessories, follow the link for an eye opening experience. http://steampunk.wonderhowto.com/inspiration/28-most-popular-steampunk-materials-your-local-hardware-store-0141461/


Thursday, July 10, 2014

The Steampunk Illusionist Expands


As the summer progresses, we are gradually converting more and more material to fit in the Steampunk Illusionist Show. Some routines need no alterations, like the routine seen above, which is an interactive piece with the entire audience. Other things like our Broken Glass Illusion, needed just a slight bit of alteration.

With the Broken Glass Illusion, we added a 'steam' effect to the routine and also changed the outer look of the prop, slightly. The steam billowing out from the box was even more amazing than I expected. I will need to run a better system of pipes within the prop in order to distribute the steam better. I like the single corner pipe but I'd like to move it to the center (a suggestion of my assistant Denise) and also better fill in the inside of the box as well. Below is a photo of the steam control panel which we opted to put on the side of the box rather than putting it upon the face. (see below)

The effect is similar to the Blade Box but with very large shards of broken glass taking the place of the old metal blades. We've done the routine for many years with the regular blades but then in 2005, added the broken glass. Using the glass instead of blades changed the routine from a kind of standard magic illusion into a very intense and dramatic routine. Some might actually say 'too intense', lol. The steam addition will probably take that level on intensity down a notch, but at the same time increase the overall production values in the routine. Anyway you slice it (pun intended), it's a strong piece of illusion magic.


Friday, May 30, 2014

More Steampunk Magic Props


I have been feverishly working to get new props built and old ones refurbished for my upcoming tour that starts soon (in days). I've attached two images for you to enjoy. The top photo is a refurbished prop that I call 'The Temporal Generator'. This is a rather clever device, whatever is placed inside can be instantly sent back in time or ahead in time. To prove it, I borrow a shoe, place it into the box and send it back in time. Then moments later I bring it back, but apparently something goes wrong and a different shoe ends up in it's place. The borrowed shoe then is discovered in an impossible place with a note from the past!

The next is a neck stock for a routine which was a Sword Thru the Neck Illusion. I won't be using a
sword, but I will have a long metal device that will go into the stocks while someone wears it. The device came out splendidly.

The real difference between the two props is that first one, the Temporal Generator, has lights and sound effects. The Neck stock has no lights or sound effects but you see the magic as it happens. Whereas in the first routine, the magic moment is somewhat delayed. So both have something unique about them and both should be wonderful additions to The Steampunk Illusionist Show.

Sunday, May 18, 2014

Refurbishing Props for the Steampunk Magic Show

I love the DIY aspect of steampunk. For the new show, I've taken a number of props and redone them in a different style. Some are very steampunk, some are just Victorian. The first is a rectangular box which holds a wooden die. The original effect came out back in the 1860s. But for whatever reason, a lot of the boxes are poorly decorated and often very cheesy.

The one I had was black with some sort of Asian motif stenciled on in gold. The die that was with it was silver. In a word, it was awful. I decided that in order to even consider using it, I'd have to redo the whole thing, which meant stripping all the paint off the box and the die. Thankfully, underneath all the paint was actual wood. Once I had it all sanded down I then stained it. There were some unusual imperfections in the wood grain that gave a really wild look to one of the doors and the back of the prop.

The stain made a huge difference in the appearance. But the silver die would not do, so I decided to paint that an off white, actually an antique white color. The new die color went perfectly with the new color of the box. When I put it all back together, it looked so much better. I did have one issue, the dots on the die. I used a paper black paper dot, but I didn't have enough to finish the whole die. I couldn't seem to find any dots at Office Depot or Staples or Walmart or anywhere. Thankfully a search only turned up black vinyl dots, perfect!

I also ordered a couple other accessories, handles and feet for the box. I knew these would help to punch up the look even more. Though I wasn't going for a steampunk look, I did want a Victorian look to the box. The final result can be seen below. It really wasn't difficult at all to completely change the look of this prop.


I'm currently working on another piece that I will be steampunking. When it's finished I'll post the before, during and after photos here.